Ready to ditch the expensive salon and create adorable Valentine's Day nails at home? This guide offers 30+ super-cute and ridiculously easy designs, perfect for beginners and pros alike! We've got step-by-step instructions and pro tips to help you achieve salon-worthy results without the salon price tag. Let's get started!
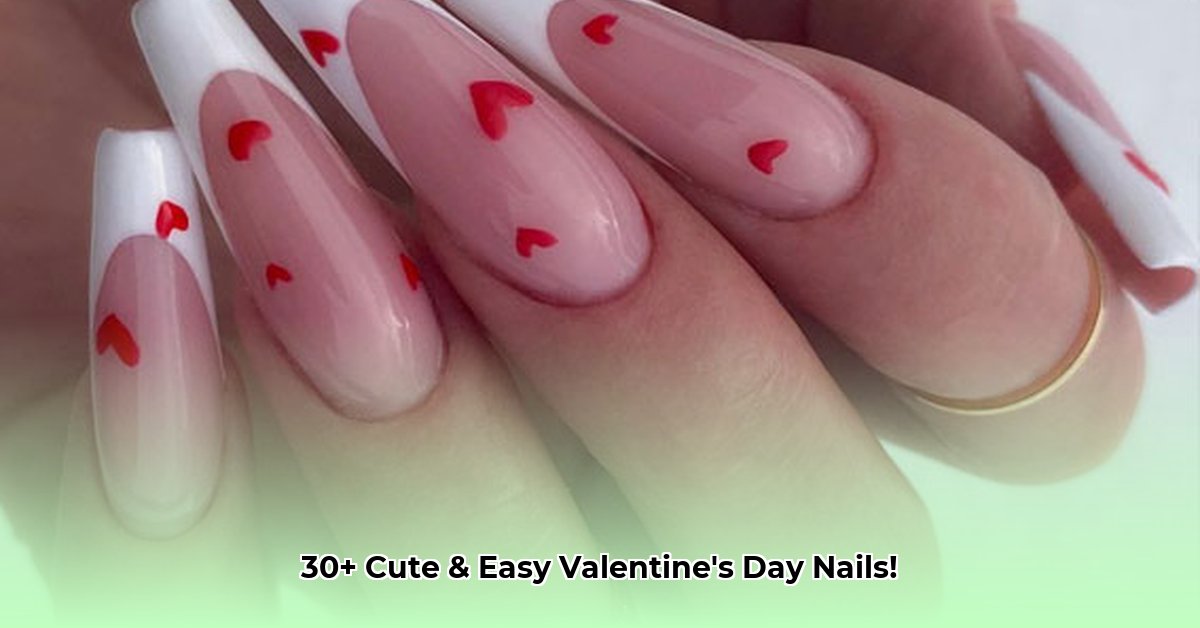
Hearts Galore: The Classic Valentine's Look (Simplified!)
This design is a Valentine's Day staple, but we've made it super easy!
What You Need:
- Base coat (protects your nails)
- Red or pink polish (or any color!)
- Top coat (for shine and longevity)
- Small detail brush (optional – the tip of your polish bottle works too!)
Instructions:
- Prep: Apply a base coat. Let it dry completely. (This prevents staining and helps your polish last longer.)
- Base Color: Apply two coats of your chosen color. Let each coat dry fully before the next. (Patience is key for a smooth finish!)
- Heart Attack (of Cuteness!): Once dry, use your brush (or the polish bottle tip) to paint tiny hearts. Vary the size and placement—get creative!
- Seal It: Apply a top coat for a shiny, long-lasting finish. (This protects your design and adds extra shine.)
The Sweetheart French Manicure: Romance Reimagined
A fun twist on a classic! This design is sophisticated and easy to achieve.
Supplies:
- Base coat
- Nude or light pink polish
- Red or pink polish (or your favorite color!)
- Top coat
Steps:
- Prep: Apply a base coat.
- Base Color: Apply two coats of nude or light pink. Let each dry completely.
- Heart-Shaped Tips: Instead of a straight line, paint a tiny heart at the tip of each nail. (Don't worry about perfection; a slightly wonky heart adds charm!)
- Top Coat: Finish with a top coat for protection and shine.
Subtle Sparkle: Glitter Accent Nails
Add a touch of glam without the fuss!
You'll Need:
- Base coat
- Nude or light pink polish (or a pastel shade)
- Pink or red glitter polish (or any color!)
- Top coat
Instructions:
- Base Coat: Apply a base coat to all nails.
- Base Color: Paint all but one or two nails with your base color.
- Glitter Time!: Apply glitter polish to your accent nail(s). One coat for subtle sparkle, more for a bolder look. Let it dry thoroughly.
- Top Coat: Finish with a top coat on all nails.
Checkerboard Chic: A Playful Pop of Color
This design is easier than it looks!
Materials:
- Base coat
- Pink and red polish (or any two colors)
- Thin nail art striping tape (or a fine detail brush)
- Top coat
Steps:
- Base Coat: Apply a base coat.
- Base Color: Apply two coats of your lighter color.
- Checkerboard: Use striping tape or a brush to create a checkerboard pattern with your second color. (Watch a video if you need help!)
- Top Coat: Finish with a top coat.
Pastel Perfection: Beyond Traditional Valentine's Colors
Explore soft and sweet alternatives to traditional Valentine's colors! Consider:
- Delicate pink with tiny white hearts.
- Lavender with shimmery silver glitter.
- Mint green with subtle gold foil details.
Pro Tips & Nail Art Tools
Investing in a few basic tools can elevate your designs! A detail brush and striping tape are great additions. Explore nail art decorations like rhinestones, stickers, or dried flowers!
Level Up Your Look: Embellishments & Extras
Add extra flair with:
- Miniature heart stickers or hand-painted hearts.
- Sparkling rhinestones.
- Gold or silver foil accents.
Remember, the key is to have fun and create a look you love! Show off your creations – we'd love to see them! What's your favorite simple Valentine's Day nail design?